 Merken
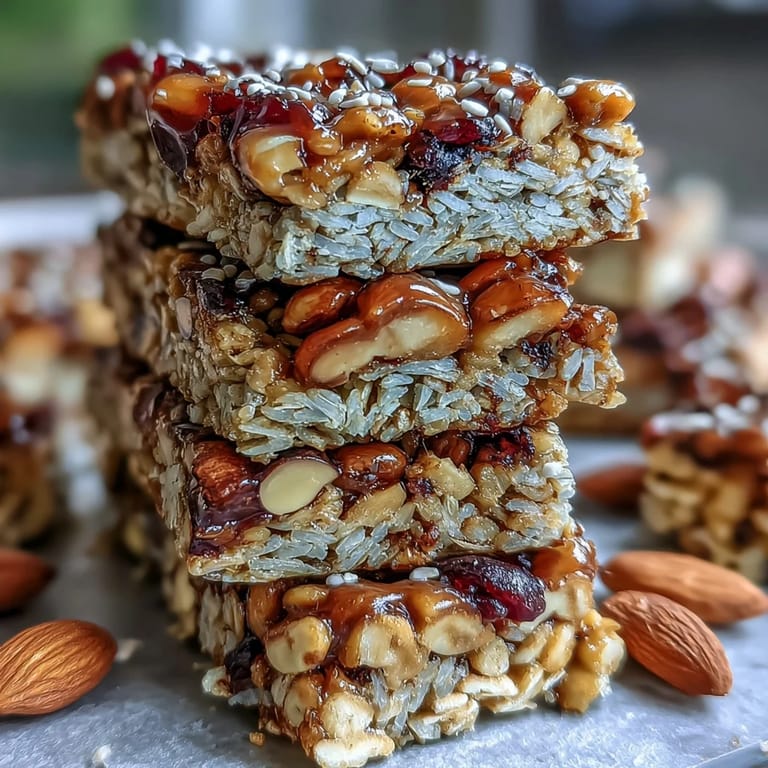
 There's something wonderfully satisfying about making your own energy bars at home—especially when they require no baking, no complicated techniques, and come together in just minutes. These No-Bake Granola Energy Bars are the perfect answer to expensive store-bought snacks, packed with wholesome oats, crunchy nuts, chewy dried fruit, and bound together with a luscious blend of honey and nut butter. Whether you're packing lunches, fueling a hike, or simply need a nutritious pick-me-up between meals, these bars deliver both flavor and function in every bite.
Merken The beauty of these granola bars lies in their versatility. You control the ingredients, which means you can adapt them to your dietary needs and taste preferences. Swap peanut butter for almond butter, use maple syrup instead of honey for a vegan version, or add a handful of chocolate chips for an extra treat. The base recipe is forgiving and welcomes experimentation, making it a staple you'll return to again and again.
Ingredients
Tired of Takeout? 🥡
Get 10 meals you can make faster than delivery arrives. Seriously.
One email. No spam. Unsubscribe anytime.
- Dry Ingredients: 2 cups old-fashioned rolled oats, 1 cup crisp rice cereal, 1/2 cup chopped mixed nuts (e.g., almonds, walnuts, pecans), 1/2 cup dried fruit (e.g., cranberries, raisins, chopped apricots), 1/4 cup unsweetened shredded coconut (optional), 1/4 teaspoon salt
- Wet Ingredients: 1/2 cup honey or maple syrup, 1/3 cup creamy peanut butter or almond butter, 1 teaspoon vanilla extract
- Optional Add-Ins: 1/4 cup mini chocolate chips, 1 tablespoon chia seeds or flaxseed meal
Instructions
- Step 1: Prepare the pan
- Line an 8-inch (20 cm) square baking pan with parchment paper, leaving some overhang for easy removal.
- Step 2: Combine dry ingredients
- In a large bowl, mix together the oats, rice cereal, nuts, dried fruit, coconut, and salt.
- Step 3: Make the binding mixture
- In a small saucepan over low heat, combine honey (or maple syrup) and peanut butter. Stir until melted and smooth, about 2–3 minutes. Remove from heat and stir in vanilla extract.
- Step 4: Mix everything together
- Pour the warm mixture over the dry ingredients. Mix well until everything is evenly coated.
- Step 5: Add chocolate chips
- If using chocolate chips, let the mixture cool for 2–3 minutes before stirring them in to prevent melting.
- Step 6: Press into pan
- Transfer the mixture to the prepared pan. Press firmly and evenly with a spatula or the back of a measuring cup.
- Step 7: Add toppings
- Sprinkle additional chocolate chips or nuts on top if desired, pressing them in gently.
- Step 8: Chill and set
- Refrigerate for at least 1 hour, or until set.
- Step 9: Cut and store
- Lift the bars from the pan using the parchment overhang. Cut into 12 bars. Store in an airtight container in the refrigerator for up to 1 week.
Zusatztipps für die Zubereitung
The key to perfect no-bake granola bars is achieving the right consistency in your binding mixture. Heat the honey and nut butter just until they're fluid and easy to mix—overheating can make the bars too hard once chilled. When pressing the mixture into the pan, use firm, even pressure to ensure the bars hold together well when cut. If the mixture seems too dry and crumbly, add an extra tablespoon of honey or nut butter. Conversely, if it's too sticky, incorporate a bit more oats or rice cereal. Don't skip the chilling step—this is what gives the bars their perfect chewy texture and makes them easy to slice cleanly.
Varianten und Anpassungen
These bars are endlessly adaptable to suit your preferences and dietary needs. For a nut-free version, swap peanut butter for sunflower seed butter and omit the mixed nuts, replacing them with extra seeds like pumpkin or sunflower seeds. Add warming spices like cinnamon or cardamom for extra flavor depth. For vegan bars, use maple syrup instead of honey and dairy-free chocolate chips. If you prefer a protein boost, stir in a scoop of your favorite protein powder along with the dry ingredients. You can also experiment with different dried fruits—chopped dates, figs, or dried cherries all work beautifully. For a tropical twist, increase the coconut and add dried pineapple or mango.
Serviervorschläge
These versatile energy bars shine in countless serving scenarios. Pack them in lunchboxes alongside fresh apple slices and cheese for a balanced midday meal. Take them on hikes or bike rides for a quick energy boost that won't weigh you down. Serve them at picnics paired with fresh fruit and iced tea for a perfect outdoor treat. They also make excellent breakfast-on-the-go options when you're running late—grab a bar and a piece of fruit for a satisfying start to your day. For a more indulgent snack, warm a bar slightly and serve with a dollop of Greek yogurt and fresh berries. They're also wonderful crumbled over yogurt parfaits or ice cream for added crunch and flavor.
 Merken
 Once you master this basic recipe, you'll find yourself making these bars regularly and experimenting with different flavor combinations. They're economical, wholesome, and infinitely better than anything you can buy at the store. Whether you're feeding hungry kids after school, fueling your own busy day, or looking for a healthier snack option, these No-Bake Granola Energy Bars deliver on every level. Make a batch this weekend and enjoy nutritious, delicious snacks all week long.
Antworten auf häufige Fragen
- → Wie wird die Mischung fest?
Die Mischung härtet im Kühlschrank aus, indem die Honig- und Nussbuttermasse die trockenen Zutaten umhüllt und beim Kühlen fest wird.
- → Kann ich Nüsse ersetzen oder weglassen?
Ja, zum Beispiel durch Sonnenblumenkerne oder eine andere Nussbutter, um Allergien zu berücksichtigen oder den Geschmack anzupassen.
- → Sind die Riegel auch für Veganer geeignet?
Mit Ahornsirup statt Honig und veganen Schokostückchen sind sie eine pflanzliche Alternative.
- → Wie lange sind die Riegel haltbar?
Im luftdichten Behälter im Kühlschrank bleiben sie bis zu einer Woche frisch und lecker.
- → Kann ich noch zusätzliche Zutaten hinzufügen?
Ja, zum Beispiel Zimt, Kardamom, Chiasamen oder Flachsamen für mehr Geschmack und Nährstoffe.